本文最后更新于 1431 天前,其中的信息可能已经有所发展或是发生改变。
上一篇文章中学习了如何在wordpress后台中添加一个自定义文章类型。由于一个自定义文章类型,肯定会有各种字段,所以需要单独进行设置字段。在上一篇文章里面有一个参数:register_meta_box_cb,它就是字段的回调函数
创建回调函数
function customer_post_type_metabox(){
        //并且添加一个自定义字段区域
        add_meta_box('customer_add','客户地址','customer_add_metabox','customer');
}
//其中add_meta_box();就是创建自定义字段区域的函数,其参数如下:
/*
'customer_add',//字段区域名称
'客户地址',//这个区域的标题
'customer_add_metabox',//显示这个字段区域的回调函数
'customer'//在指定的文章类型中显示
*/
接下来需要创建显示这个字段区域的函数
function customer_add_metabox(){
        global $post;
        //创建安全隐藏表单
        wp_nonce_field('customer_add_metabox','customer_add_metabox_nonce');
        //获取数据库字段_customer_add的值,这里字段以短下划线为前缀,可以让其在文章编辑界面自带的自定义字段中隐藏
        $value = get_post_meta($post->ID,'_customer_add',true);
        $value2 = get_post_meta($post->ID,'_customer_add2',true);
php结束标记
?>
html编写两个输入框,注意name属性和id属性值
        <span>地址1:</span>
        <input id="customer_add" style="width: 180px;" name="customer_add" type="text" value="<?php echo $value;?>" placeholder="输入客户地址" />
        <span>地址2:</span>
        <input id="customer_add2" style="width: 180px;" name="customer_add2" type="text" value="<?php echo $value2;?>" placeholder="输入客户地址" />
php开始标记
<?php
}
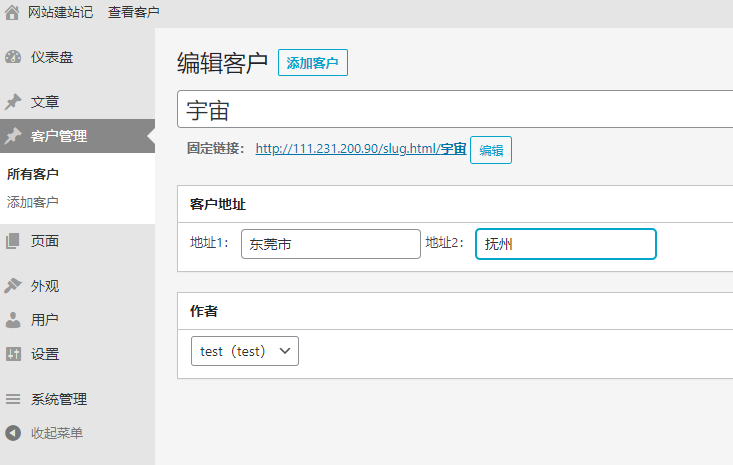
此时,在自定义文章类型编辑界面就会显示这个自定义字段区域,并显示出这两个输入框啦。但是你会发现保存功能好像并没有把数据保存进数据库,因为需要单独写保存的功能
function customer_save_metabox($post_id){
        //表单验证
        if(
           !isset($_POST['customer_add_metabox_nonce']) ||
           !wp_verify_nonce($_POST['customer_add_metabox_nonce'],'customer_add_metabox') ||
           !current_user_can('edit_post',$post_id)
          ){return;}
        //保存字段的值
        update_post_meta($post_id,'_customer_add',$_POST['customer_add']);
        update_post_meta($post_id,'_customer_add2',$_POST['customer_add2']);
        /*
        $post_id 既是当前文章的id
        '_customer_add' 对应数据库中的字段
        $_POST['customer_add2'] 要保存的数据
        */
}
还有最后一个,挂载到保存文章的函数上
add_action('save_post','customer_save_metabox');